
Buying guide
The Ultimate Guide to LED Downlights
Downlights look simple — a neat circle of light in the ceiling — but choosing the right ones involves more decisions than almost any other light fitting. Fire ratings, IP ratings, lumens, colour temperature, beam angles, cut-out sizes, dimmer compatibility: get them all right and you'll have crisp, even, comfortable light for years. Get one wrong and you're living with glare, flicker or a ceiling full of holes that don't match your new fittings.
This guide walks through every decision in plain English, in the order you'll actually face them. Each section gives you enough to choose confidently, with a link to a deeper guide where one exists. And wherever building regulations come up, remember the golden rule: this is general guidance, and you should always confirm the specifics of your installation with a qualified electrician.
What LED downlights are — and the main types
A downlight (sometimes called a spotlight or recessed light) is a fitting that sits in or on the ceiling and directs light downwards. LED versions have almost entirely replaced the old halogen type, and for good reason: they use a fraction of the electricity, run far cooler and last many times longer.
GU10 vs integrated
Your first decision is how the light source works:
- GU10 downlights use a replaceable GU10 bulb that twists in and out. If a bulb fails, or you want a different colour temperature or brightness, you swap the bulb in seconds. The fitting itself can outlast several bulbs.
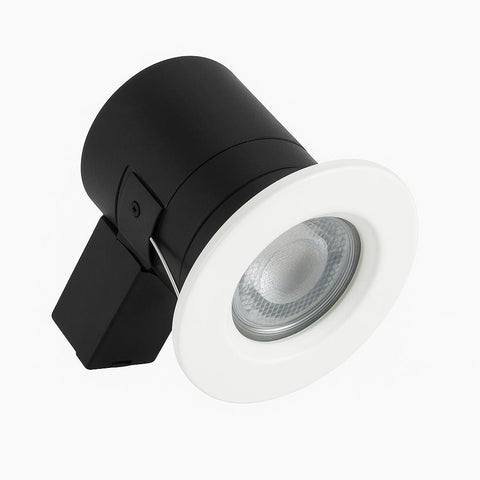
- Integrated downlights have the LED built into the fitting. They tend to be slimmer, better sealed (useful in bathrooms), and often have longer rated lifespans and features like CCT switching. The trade-off: when the LED eventually reaches the end of its life, you replace the whole fitting rather than just a bulb.
Neither is "better" — it's a preference. If you like the flexibility of swapping bulbs, browse GU10 downlights. If you want the slimmest, most sealed option, integrated fittings win.
Recessed, surface-mounted or trimless
- Recessed downlights sit inside a hole cut in the ceiling, with only a slim bezel visible. This is the classic look and by far the most common choice.
- Surface-mounted downlights fix to the face of the ceiling — useful where there's no void above (concrete ceilings, for example) or where you can't cut holes.
- Trimless (plaster-in) downlights are skimmed into the ceiling during plastering so there's no visible bezel at all — just a clean circle of light. They're the designer option and need to be fitted before final decorating. See our trimless plaster-in downlights.
One more variation worth knowing: low-profile downlights are designed for shallow ceiling voids where a standard fitting won't physically fit — common in flats and extensions. Browse low-profile downlights if depth is tight.
Ready to browse everything in one place? Start with our full range of LED downlights.
Fire ratings and regulations: the non-negotiable bit
Here's the part many people skip — and shouldn't. When you cut a hole in a ceiling to fit a recessed downlight, you weaken that ceiling's ability to hold back fire. A plasterboard ceiling that would resist fire for 30 or 60 minutes can be compromised by a simple 70mm hole.
Fire-rated downlights solve this. They contain intumescent material that expands in the heat of a fire, sealing the hole and restoring the ceiling's fire resistance. Ratings are typically 30, 60 or 90 minutes, matched to the fire resistance of the ceiling they're fitted into.
In the UK, building regulations (Approved Document B in England and Wales) cover fire safety in dwellings, and fire-rated fittings are commonly required where a ceiling forms part of a fire barrier — for example, beneath a bedroom or a loft conversion. Approved Document L, meanwhile, deals with energy efficiency, which LED downlights comfortably help with. The details depend on your property and installation, so treat this as general guidance and always confirm requirements with a qualified electrician or building control.
The practical takeaway is simple: fire-rated downlights cost little more than non-rated ones, so they're the sensible default for virtually every recessed installation. Browse fire-rated LED downlights.
One related issue: if there's loft insulation above your ceiling, standard downlights shouldn't be covered by it — trapped heat shortens their life and creates risk. Look for insulation-coverable (IC-rated) downlights instead.
Go deeper: Fire-Rated Downlights Explained.
IP ratings and bathrooms: where water changes everything
An IP (Ingress Protection) rating tells you how well a fitting resists dust and water. The second digit is the one that matters for bathrooms: IPX4 means protected against splashes, IPX5 against water jets, and higher numbers mean more protection still.
UK wiring regulations (BS 7671) divide bathrooms into zones based on proximity to water:
- Zone 0 — inside the bath or shower tray itself. Rarely relevant for downlights.
- Zone 1 — directly above the bath or shower, up to 2.25m from floor level. Fittings here generally need at least IPX4, and higher where water jets are likely.
- Zone 2 — the area extending 0.6m beyond zone 1. At least IPX4 is the usual expectation.
- Outside the zones — no specific IP rating is mandated, though a sensible level of splash protection is still wise in a steamy room.
These are the broad principles rather than a substitute for the regulations themselves — bathroom electrics are one area where you should always use a qualified electrician, both for safety and because bathroom electrical work is often notifiable under building regulations.
In practice, many people simply fit good-quality IP65 downlights throughout the bathroom and never have to think about zone boundaries again. Browse bathroom downlights.
Go deeper: Bathroom Downlights: IP Ratings & Zones and our full Bathroom Downlights Guide.
Brightness: think lumens, not watts
With old halogen bulbs, wattage was a rough guide to brightness — a 50W halogen was a 50W halogen. LEDs broke that link. A modern LED downlight might produce as much light as that 50W halogen from around 5W, and two 5W LEDs can differ noticeably in output.
So ignore watts as a brightness measure and look at lumens (lm) — the actual quantity of light produced. As very rough reference points:
- Around 350–450 lumens per downlight is typical for general room lighting.
- Task areas like kitchen worktops benefit from more output or tighter spacing.
- A whole room usually wants a total lumen budget: roughly 100–150 lumens per square metre for relaxed living spaces, and 250–350+ for kitchens and workspaces.
Watts still matter for one thing: running costs. Divide lumens by watts and you get efficacy (lumens per watt) — higher is more efficient. Most quality LED downlights now sit comfortably around or above 100 lm/W.
Brightness planning and downlight quantity go hand in hand, which brings us neatly to spacing — covered below, with a deeper guide of its own.
Colour temperature: warm, cool or switchable
Colour temperature, measured in kelvin (K), describes how warm or cool the light looks. It changes the entire feel of a room more than almost any other decision on this list.
| Colour temperature | Common name | Feel | Best for |
|---|---|---|---|
| 2700K | Extra warm white | Cosy, candle-adjacent glow | Living rooms, bedrooms, snugs |
| 3000K | Warm white | Warm but slightly crisper | Living areas, hallways, all-rounder |
| 4000K | Cool white | Clean, bright, alert | Kitchens, bathrooms, home offices, utility |
| 6000K+ | Daylight | Very crisp, blue-tinted | Rarely ideal in homes; garages, some workspaces |
Two useful rules of thumb: match colour temperatures within a single room (mixing looks accidental), and if a room serves multiple purposes — a kitchen-diner, say — lean warmer or choose switchable.
CCT-switchable downlights are one of the most useful recent developments: a small switch on the fitting lets you choose between (typically) three or more colour temperatures at installation, and change your mind later. They also simplify buying — one fitting suits every room in the house.
Go deeper: Colour Temperature Guide.
Dimming: three things must agree
Dimmable downlights let you take a kitchen from bright task lighting to relaxed dinner-party mode with one control. But LED dimming has a reputation for flicker and buzz, and it's almost always caused by mismatched components. For smooth dimming, three things need to be compatible:
- The downlight (or bulb) — it must be explicitly dimmable. Dimming a non-dimmable LED can damage it.
- The dimmer switch — LEDs generally want a trailing-edge dimmer designed for low LED loads. Old dimmers made for halogen often have a minimum load higher than a whole circuit of LEDs.
- The driver (integrated fittings) — the small unit that converts mains power for the LED must itself support dimming.
A couple of practical tips: check the dimmer manufacturer's compatibility list where possible, and note the dimmer's minimum and maximum load against the total wattage of your circuit. If in doubt, your electrician can advise — and swapping a dimmer switch is a quick job for them.
If you'd rather skip dimmer switches entirely, smart downlights (covered below) dim from an app or voice assistant instead.
Glare and beam angles: the comfort factors
Two specs quietly separate comfortable lighting from a ceiling full of glare bombs.
Beam angle
The beam angle describes how wide the cone of light is:
- Narrow (around 24–38°) — focused pools of light. Good for accenting, artwork, or higher ceilings where the beam spreads before it lands.
- Medium to wide (around 38–60°) — the standard choice for general room lighting, giving even coverage with sensible spacing.
- Very wide (60°+) — maximum spread, useful in low-ceilinged rooms where you want fewer fittings.
Wider beams need fewer fittings but produce softer, less dramatic light; narrower beams create contrast and interest but need more careful placement.
Glare control
Glare happens when you can see the bright LED source directly from normal viewing angles. Anti-glare downlights recess the light source deeper into the fitting (a "deep set" or baffled design), often quoted with a UGR (Unified Glare Rating) — lower is better, with UGR<19 a common comfort benchmark. Glare control matters most in living rooms, media rooms, bedrooms and anywhere you'll be looking up or relaxing. Browse anti-glare downlights.
Cut-out sizes and fitting: measure before you buy
Every recessed downlight specifies a cut-out size — the diameter of hole it needs. Common cut-outs sit around 65mm–75mm, but they vary between models, so never assume.
Three scenarios, three approaches:
- New installation: you're free to choose. Just check the fitting's recess depth against your ceiling void — and remember integrated fittings need space for their driver too.
- Replacing existing downlights: measure your current holes first, then choose fittings with a matching cut-out or a bezel wide enough to cover the existing hole. Some fittings are designed specifically to cover oversized or slightly damaged holes.
- Shallow voids: if there's very little space above the plasterboard, choose low-profile downlights designed for exactly this.
Fitting itself is usually straightforward — spring clips hold the downlight against the ceiling — but the wiring is electrical work. New circuits and work in bathrooms or kitchens can be notifiable under building regulations, so use a qualified electrician; they'll also sort connections, loop-in wiring and any dimmer or switch changes properly.
Replacing old halogens? There are a few extra wrinkles (transformers, hole sizes, dimmers) — see Replacing Old Halogen Downlights.
How many downlights, and where to put them
The most common downlighting mistakes are too few fittings (gloomy corners) or too many (airport runway). A reliable starting framework:
- Quantity: roughly one downlight per 1 to 1.5 square metres of ceiling for general lighting. A 4m × 3m room (12m²) typically wants 8–10 downlights, fewer if they're high-output or the room is a bedroom.
- Spacing from walls: keep fittings around 0.6m–1m from walls to avoid harsh scalloping down the wall surface (unless you want deliberate wall-washing).
- Spacing between fittings: a rough rule is ceiling height divided by two — so 2.4m ceilings suggest roughly 1.2m between downlights.
- Layout: plan around how the room is used, not just symmetry. Light the worktops, the reading corner, the mirror — then fill in for even coverage. In kitchens, position fittings over the front edge of worktops so you don't work in your own shadow.
These rules interact with lumens and beam angle: brighter fittings with wide beams can be spaced further apart. Rather than juggling it all by hand, use our free downlight spacing calculator — enter your room dimensions and it does the layout maths for you.
Go deeper: How Many Downlights Do I Need?
Finishes and style: the visible 5%
Ninety-five per cent of a downlight hides in the ceiling; the bezel is the bit you live with. Common finishes include:
- White — disappears into a white ceiling; the safe default and the right answer more often than not.
- Chrome and polished finishes — a jewellery-like glint; suits contemporary bathrooms and kitchens but shows the fitting off rather than hiding it.
- Brushed nickel / satin — a softer metallic that pairs well with stainless appliances and brushed door hardware.
- Black and anthracite — increasingly popular for modern, industrial-leaning interiors; makes a deliberate feature of each fitting.
- Trimless — no bezel at all, plastered in for the cleanest possible ceiling. See trimless plaster-in downlights.
Beyond finish, consider fixed vs adjustable (tilt) heads: fixed downlights point straight down, while adjustable ones tilt to wash light across walls, artwork or sloped ceilings. A useful trick on angled ceilings, where fixed downlights would fire light sideways across the room.
Matching finishes to your room scheme matters most in kitchens, where downlights sit alongside pendants and under-cabinet lighting — our Kitchen Downlights Guide covers how to layer it all together.
Smart downlights: app control, voice and colour
Smart downlights connect to your home network (typically over WiFi, sometimes via a hub) and unlock control that a wall switch can't match:
- App and voice control — dim, switch and group lights from your phone or through Alexa, Google Assistant and similar.
- Tunable white — shift colour temperature through the day: cool and energising in the morning, warm and relaxed in the evening.
- RGB colour — full colour-changing for accent lighting, media rooms and, let's be honest, fun.
- Schedules and scenes — one tap for "movie night" or "dinner", automatic dimming at bedtime, lights that fade up with your alarm.
Practical notes: smart downlights dim through the app rather than a conventional dimmer, so they usually pair with a standard (non-dimming) switch left permanently on — worth discussing with your electrician. And check which ecosystem the fitting supports before committing a whole ceiling to it. Browse smart WiFi and RGB downlights.
Your downlight buying checklist
Here's every decision from this guide in one table. Work down it before you order and you won't get caught out.
| Decision | What to check | Quick guidance |
|---|---|---|
| Type | GU10 or integrated; recessed, surface or trimless | GU10 for swappable bulbs; integrated for slim, sealed, long-life fittings |
| Fire rating | 30/60/90-minute rating vs your ceiling | Fire-rated is the safe default; confirm requirements with a qualified electrician |
| Insulation | Is there insulation above the ceiling? | If yes, choose IC-rated (insulation-coverable) fittings |
| IP rating | Bathroom zone the fitting sits in | At least IPX4 in zones 1–2; IP65 throughout is a simple approach |
| Brightness | Lumens per fitting and total for the room | Roughly 100–150 lm/m² for living spaces, 250–350+ lm/m² for kitchens |
| Colour temperature | 2700K–3000K warm, 4000K cool, or CCT-switchable | Warm for relaxing rooms, cool for task rooms; switchable if unsure |
| Dimming | Downlight, dimmer switch and driver all dimmable and compatible | Trailing-edge dimmers suit most LEDs; check compatibility lists |
| Beam angle & glare | Beam width for the ceiling height; UGR/anti-glare design | 38–60° for general lighting; anti-glare for living rooms and bedrooms |
| Cut-out & depth | Hole diameter and recess depth vs your ceiling void | Measure existing holes when replacing; low-profile for shallow voids |
| Quantity & spacing | Layout for the room size and use | Start at one fitting per 1–1.5m²; use the spacing calculator |
| Finish | Bezel colour and fixed vs adjustable | White to disappear, metallics or black to feature; tilt for sloped ceilings |
| Smart features | App/voice control, tunable white, RGB | Check ecosystem compatibility; pair with a standard switch |
Lighting a whole house or a big renovation? Multipacks bring the per-fitting price down — see our bulk buy multipack deals.
Ready to choose?
That's every downlight decision, from fire ratings to finishes. If you take just three things from this guide: go fire-rated by default, buy by lumens not watts, and match colour temperature to how each room is used — with CCT-switchable fittings as the get-out-of-jail card when you can't decide.
Start with the full LED downlights range, plan your layout with the spacing calculator, and if anything's unclear, the deeper guides linked throughout cover each topic properly. Order by 3pm for same-day dispatch, delivery is free on UK orders over £50, and everything's covered by 30-day returns — so if a bezel finish doesn't look right against your ceiling, you're not stuck with it.
And one final reminder, because it matters: wherever fire ratings, bathroom zones or wiring are involved, always confirm the details of your installation with a qualified electrician.
Frequently asked questions
What is the difference between GU10 and integrated LED downlights?
A GU10 downlight uses a replaceable bulb that twists in and out, so you can swap it in seconds if it fails or you fancy a different colour temperature. An integrated downlight has the LED built into the fitting, which usually means a slimmer profile, better sealing for bathrooms and longer rated lifespans — but when the LED eventually fails, you replace the whole fitting.
Do I need fire-rated downlights?
In most cases, yes. Cutting holes in a ceiling weakens its ability to hold back fire, and fire-rated downlights restore that protection with intumescent material that seals the hole in a fire. Building regulations (Approved Document B) often require them, particularly below rooms above. Fire-rated fittings are the safe default everywhere — always confirm your specific requirements with a qualified electrician.
How many downlights do I need per room?
A common starting point is one downlight per 1 to 1.5 square metres, spaced roughly a metre from walls and evenly across the ceiling. In practice it depends on ceiling height, lumen output per fitting, beam angle and what you use the room for — kitchens need more light than bedrooms. Our spacing calculator does the maths for your exact room dimensions.
What colour temperature should I choose for downlights?
Warm white (2700K–3000K) suits living rooms and bedrooms where you want a cosy, relaxed feel. Cool white (4000K) gives a crisper, brighter feel that works well in kitchens, bathrooms and home offices. If you can't decide, CCT-switchable downlights let you select the colour temperature at installation with a small switch on the fitting — and change it later.
Can LED downlights be covered with insulation?
Only if the fitting is specifically rated for insulation contact — often marked IC-rated or insulation coverable. Covering a standard downlight with loft insulation traps heat, shortens its life and can be a fire risk. If your ceiling has insulation above it, choose IC-rated fittings or fit protective covers, and ask your electrician to confirm the safe approach for your installation.
Are LED downlights dimmable?
Many are, but not all — always check before buying. For a smooth, flicker-free result you need three things to work together: a dimmable downlight (or dimmable GU10 bulb), a compatible dimmer switch (usually trailing-edge for LEDs) and, for integrated fittings, a dimmable driver. Mismatched components cause flickering or buzzing, so check compatibility lists or ask your electrician.
What size hole do I need to cut for a downlight?
Every downlight lists a cut-out size — the diameter of hole it needs, commonly around 65mm–75mm for standard fittings. If you're replacing existing downlights, measure your current holes first and choose new fittings with a matching cut-out, or ones designed to cover slightly larger holes. Getting this right saves a lot of filling and repainting.
How long do LED downlights last?
Quality LED downlights are typically rated for tens of thousands of hours — often 25,000 hours or more — which works out at many years of normal daily use. That's a huge step up from halogen bulbs, which often lasted only 1,000–2,000 hours. Lifespan ratings assume the fitting can dissipate heat properly, which is another reason not to cover non-IC-rated fittings with insulation.
Shop this guide

Work out exactly how many you need
Pop your room size into our free spacing calculator and get a recommended layout in seconds.
Open the calculatorSame-day dispatch before 3pm · Free UK delivery over £50 · 30-day returns