
Buying guide
How Many Downlights Do I Need? Spacing & Layout Guide
"How many downlights do I need?" is the question we're asked more than any other — and getting it wrong is expensive in both directions. Too few and you're squinting at worktops in permanent gloom; too many and your ceiling looks like a departure lounge, with holes cut that you can't easily undo.
The good news: there's a simple, reliable method that lighting designers use, and you can do it with nothing more than a tape measure and a calculator. Even better, we've built the whole thing into our free downlight spacing calculator — pop in your room size and type, and it does the maths for you in seconds. But if you'd like to understand the method (or sense-check the calculator's answer), this guide walks you through it step by step.
If you're still deciding which downlights to buy in the first place, start with our Ultimate Guide to LED Downlights — this article assumes you know the fitting and just need to know how many.
The Lumens-Per-Square-Metre Method
Forget wattage — with LED, lumens are what matter. Lumens measure actual light output, and every downlight we sell lists its lumen figure. The method has three steps:
- Measure your room area. Length x width in metres. A 4m x 3m kitchen is 12m².
- Multiply by the target lumens per m² for that room type. Different rooms need different light levels — a kitchen needs far more than a bedroom (table below).
- Divide by the lumens of your chosen downlight. The answer is how many fittings you need. Always round up.
As a formula: (room area in m² x target lumens per m²) ÷ lumens per fitting = number of downlights.
Recommended Lumens Per Square Metre by Room
These targets are based on typical UK homes with standard 2.4m ceilings and light-to-mid coloured walls. They give comfortable, practical light levels — bright enough to work by where you need it, relaxed where you don't.
| Room | Lumens per m² | Notes |
|---|---|---|
| Kitchen | 300–400 | Aim high — you're doing detailed tasks with sharp objects |
| Bathroom | 300–400 | Shaving and make-up need good light; use IP65-rated fittings in zones |
| Home office / study | 300–400 | Treat like a workplace to reduce eye strain |
| Utility room | 250–300 | Functional space, functional light |
| Living room | 100–200 | Lower end for cosy; layer with lamps |
| Dining room | 150–250 | Mid-range, dimmable for evenings |
| Bedroom | 100–200 | Relaxed light; add bedside lamps for reading |
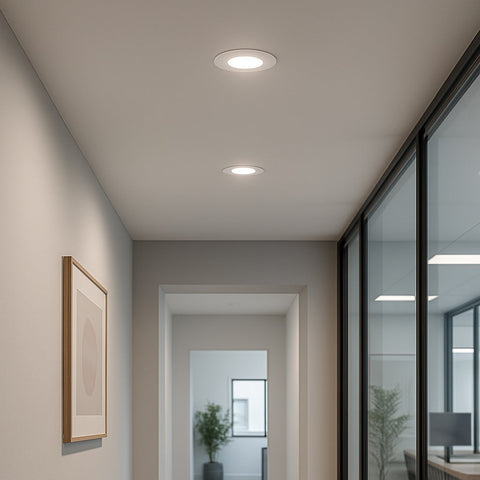
| Hallway / landing / stairs | 150–200 | Enough to move safely, especially on stairs |
Nudge towards the top of each range if you have dark walls, dark flooring, ceilings above 2.4m, or older eyes in the household — light absorption and age both eat lumens faster than you'd think. Nudge down if the room gets excellent daylight and you mostly use it in the evening with lamps.
Worked Examples
Let's run the method on two of the most common rooms we're asked about.
Example 1: 3m x 4m Kitchen
Area: 3 x 4 = 12m². Kitchens sit at the top of the table, so we'll use 350 lumens per m² as a solid middle target. Total light needed: 12 x 350 = 4,200 lumens. With a typical 600-lumen LED downlight: 4,200 ÷ 600 = 7 fittings. In practice you'd fit 6 or 8 for a symmetrical layout — and with a kitchen, round up to 8 and add a dimmer.
Example 2: 2m x 2.5m Bathroom
Area: 2 x 2.5 = 5m². At 350 lumens per m²: 5 x 350 = 1,750 lumens. With 600-lumen fittings: 1,750 ÷ 600 = 2.9, so 3 downlights — or 4 in a neat rectangle if you prefer symmetry and a brighter mirror area.
| Step | 3m x 4m kitchen | 2m x 2.5m bathroom |
|---|---|---|
| Room area | 12m² | 5m² |
| Target lumens per m² | 350 | 350 |
| Total lumens needed | 4,200 | 1,750 |
| Lumens per fitting | 600 | 600 |
| Fittings (rounded up) | 7 (fit 8 for symmetry) | 3 (or 4 for symmetry) |
Prefer not to do this by hand? Our spacing calculator runs exactly these numbers for any room size and downlight — and suggests the spacing too, which is our next topic.
Spacing Rules of Thumb
Knowing you need 8 downlights is half the job. Where they go decides whether the room feels evenly lit or patchy. Two simple rules cover most situations:
- Between fittings: ceiling height ÷ 2. A standard 2.4m ceiling means downlights roughly 1.2m apart. A 2.7m ceiling means about 1.35m apart — higher ceilings let light spread further before it reaches you.
- To the walls: half the fitting spacing. If your downlights are 1.2m apart, keep them about 60cm from the walls. This prevents harsh bright scallops running down the walls and stops the room edges falling into shadow.
These are rules of thumb, not laws. Stretch spacing to around 1.5m for relaxed background light in living rooms; tighten to about 1m over task areas. Beam angle matters too — a wide 60° beam covers more floor per fitting than a narrow 38° spot, which is one reason narrow-beam downlights suit accent lighting better than general coverage.
Layout Patterns: Grid vs Task-Focused
The grid layout
The classic approach: downlights in even rows, spaced by the rules above. It delivers uniform light and looks tidy on the ceiling. It's the right choice for hallways, landings, home offices and simple square rooms. The drawback is that a pure grid ignores how you actually use the room — it lights the middle of the floor beautifully while your worktop, desk or mirror sits between fittings.
The task-focused layout
Here you start from the jobs the room does. Plot the worktops, the hob, the sink, the desk, the bathroom mirror, the reading chair — and place downlights to serve each one. Then add a few fittings to fill in general light between the task zones.
The hybrid (what we usually recommend)
For kitchens and bathrooms especially, do both: sketch your task zones first, position fittings for those, then arrange the remainder into as even a pattern as the room allows. The ceiling may not be a perfect grid, but the room will work far better. Our Kitchen Downlights Guide goes deeper on zoning the hardest-working room in the house.
Avoiding Shadows on Worktops
This is the single most common downlight layout mistake, and it's easy to prevent. If a downlight sits behind where you stand at a worktop, your body blocks the light and you end up chopping onions in your own shadow.
The fix: position downlights directly above the front edge of the worktop — typically 30–45cm out from the wall units (or from the wall, if there are no units). The light then lands on the surface in front of you rather than on your shoulders. Run a line of fittings along each worktop run at roughly 1m intervals, and treat the hob and sink as fixed points that each deserve a fitting nearby.
Glare is the other worktop hazard — a bright LED reflecting off a glossy counter or splashback is genuinely unpleasant. Recessed anti-glare designs sit the LED deeper in the bezel so you see lit surfaces, not the light source itself. Browse our anti-glare downlights if your kitchen has reflective finishes.
What About Odd-Shaped Rooms?
L-shaped kitchens, sloped-ceiling lofts and knocked-through living-diners don't fit a neat grid — but the method still works. The trick is to divide the room into rectangles and treat each one separately:
- L-shaped rooms: split the L into two rectangles, calculate lumens and layout for each, then check the spacing where they meet so you don't double up or leave a gap at the junction.
- Knocked-through spaces: treat each zone by its function — the dining end at 150–250 lumens per m², the kitchen end at 300–400 — and put them on separate switches or dimmer circuits so each zone lives its own life.
- Sloped ceilings: use the average ceiling height for spacing calculations, and consider tilt (adjustable) downlights on the slope so the beam points down at the floor rather than across the room.
- Alcoves and bay areas: give each its own fitting rather than hoping the main grid reaches in — recesses swallow light.
Odd rooms are exactly where the calculator plus a pencil sketch beats guesswork: run each rectangle through the calculator, mark the fittings on your sketch, and check nothing important lands in a gap.
Dimmers: Your Insurance Policy
Here's the professional secret that takes the anxiety out of the whole exercise: when in doubt, round up and fit a dimmer.
An under-lit room is a permanent problem — adding downlights later means more holes, more cables and more disruption. An over-lit room with a dimmer is no problem at all: turn it down to exactly the level you like, and enjoy having full brightness on tap for cleaning, cooking or dark January mornings. Dimming LEDs also uses proportionally less energy, so there's no running-cost penalty for the headroom.
Two things to check: your downlights must be dimmable (not all LEDs are), and your dimmer switch must be a trailing-edge type designed for LED loads — old halogen dimmers cause flicker and buzzing. If you're upgrading from halogen anyway, our guide to replacing halogen downlights with LED covers the switch-over in detail.
While you're planning, don't forget colour temperature — the number of fittings sets how much light you get, but the Kelvin rating sets how it feels. Our Colour Temperature Guide helps you choose between warm white, cool white and daylight for each room.
Quick Recap and Next Steps
- Calculate: room area x lumens per m² (from the table) ÷ lumens per fitting = number of downlights. Round up.
- Space fittings at ceiling height ÷ 2 apart, and half that from the walls.
- Plot task areas first — worktops, mirrors, desks — then fill in general light around them.
- Keep kitchen downlights over the front edge of worktops so you never work in your own shadow.
- Split odd-shaped rooms into rectangles and calculate each separately.
- Round up and fit a trailing-edge dimmer as insurance.
Once you know your number, it usually makes sense to buy in multipacks — our multipack deals bring the per-fitting price down when you're kitting out a whole room, and a full kitchen or bathroom easily clears the £50 threshold for free UK delivery. Browse the full range of LED downlights, or head straight to our kitchen downlights collection if that's the room you're planning.
Order by 3pm and we'll dispatch the same day — and if you've over-ordered or changed your layout, our 30-day returns policy means spare fittings can simply come back. Measure up, run your numbers (or let the calculator do it), and your ceiling plan is sorted.
Frequently asked questions
How far apart should downlights be?
A reliable rule of thumb is to divide your ceiling height by two. With a standard 2.4m UK ceiling, that means spacing downlights roughly 1.2m apart. This gives an even wash of light with no dark patches between fittings. You can stretch to 1.5m for general background lighting, or tighten to around 1m over kitchen worktops and other task areas.
How far from the wall should downlights be?
Position downlights at half the fitting-to-fitting distance from the wall. So if your downlights are 1.2m apart, keep them about 60cm from the walls. Any closer and you get harsh bright scallops on the wall; any further and the room edges fall into shadow. If you're deliberately washing light down feature walls or artwork, you can move closer, but 50–75cm is the sweet spot for most rooms.
How many downlights do I need for a 3m x 3m room?
A 3m x 3m room is 9m². For a bedroom or living room at 150 lumens per m², you need about 1,350 lumens — two or three downlights at 500–600 lumens each. For a kitchen or home office at 300–400 lumens per m², you need 2,700–3,600 lumens — around four to six fittings. Our free spacing calculator will do the sums for your exact room and fitting.
Can you have too many downlights?
Yes — over-lighting is a common mistake. Too many downlights makes a room feel flat and clinical, wastes energy and can look like a supermarket ceiling. That said, slightly too many with a dimmer fitted is far better than too few, because you can always dim down but you can't add light you didn't install. Aim for the recommended lumens per m² and use a dimmer for flexibility.
How many downlights do I need per square metre?
Think in lumens rather than fittings: roughly 100–200 lumens per m² for living rooms and bedrooms, 300–400 for kitchens and bathrooms, and 150 for hallways. As a very rough shortcut with typical 500–600 lumen downlights, that works out at about one downlight per 3m² in living areas and one per 1.5–2m² in kitchens and bathrooms.
Should downlights be in a grid or over specific areas?
Most rooms work best with a hybrid: a loose, even grid for general light, plus extra fittings positioned over task areas like worktops, desks, mirrors and reading spots. A rigid grid alone often puts light where nobody needs it and leaves work surfaces in shadow, so always plot your task zones first and build the grid around them.
Where should downlights go over a kitchen worktop?
Place them directly above the front edge of the worktop — roughly 30–45cm out from the wall units, or from the wall if there are no units. If downlights sit behind where you stand, your own body blocks the light and you chop vegetables in your own shadow. Fittings over the front edge throw light onto the surface in front of you instead.
Is there a downlight spacing calculator I can use?
Yes — our free interactive downlight spacing calculator works out how many fittings you need and how to space them. Enter your room size and type, and it applies the same lumens-per-m² method and spacing rules explained in this guide, without any manual maths.
Shop this guide
Work out exactly how many you need
Pop your room size into our free spacing calculator and get a recommended layout in seconds.
Open the calculatorSame-day dispatch before 3pm · Free UK delivery over £50 · 30-day returns